THE ARTE OF COLLABORATION
join the waitlist
A curated library for photographers shaping intentional, refined work
THE
LUMIÈRE
COLLECTIVE

SHOOTING IN HARSH LIGHT
April 15, 2025
By Kristen Krehbiel | Article From Belle Lumière Volume XIX
Why You Shouldn’t Fear Harsh Light
Many photographers tend to shy away from harsh light, trying to avoid it at all costs. Does this sound like you? Keep reading to learn a few tips and give it a try at your next shoot. It might not be quite as scary as you think.
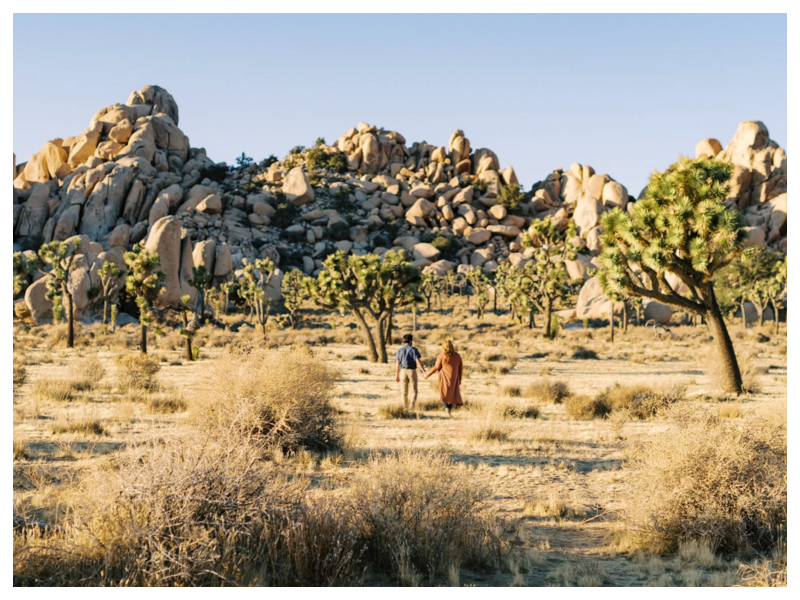
I’ve learned to embrace and have even grown to love harsh light. As a desert photographer, it’s the light we get most often. We have harsh, intense light right up until the sun goes down—and then it gets dark. Harsh light isn’t always the most flattering or the easiest to photograph in, but it has become one of my favorite kinds of light the more I’ve embraced it.
Choosing Your Gear and Settings When Shooting in Harsh Light
Film
Film does a great job in harsh light because of its dynamic range and its ability to retain the details in the highlights, even on a super bright day. This is why choosing to shoot film in harsh light is a great option. Film also typically captures skin in a more flattering way, which is especially helpful in harsh light situations where blemishes tend to show up a little more.
It’s important in harsh light to use your light meter in a way that ensures you are exposing properly for the look you’re wanting to achieve. If you’re wanting a more dramatic, contrasty image, expose for the brightest part of the subject. The brights will be properly exposed, and the dark areas will be super dark. If you’re wanting a more even look, meter in the shadow of the subject’s face or body. This will leave the areas in the light super bright but will also keep the details in the shadows.
Digital
When shooting digital in harsh light, you always want to make sure you are underexposing your image. Don’t worry if it looks dark on the back of your camera. You’ll be able to lighten it up on your computer when editing and will still have the details in the highlights, instead of them being completely blown out with no information. This would happen if you overexpose those images, leaving you with details that you aren’t able to get back when editing.
For your in-camera settings, your digital camera will allow you to choose a playback setting that makes the highlights that are blown blink when you preview the images on the back of your camera. This is a good tool to quickly see if the bright areas of the photo have detail or not.
Another trick is to take advantage of your lens hood or hand to help block some of the harsh light from hitting your lens and causing unwanted glare. So when heading out to a session where you know the light is going to be harsh, make sure you pack your lens hoods when you do your bag check.
Posing During Harsh Light
Here are a few tips for posing and composing to overcome your fear of harsh light.
Looking away, looking down, and looking at each other poses
When photographing a subject in harsh light or at mid-day, you don’t want to have them look at the camera. This seems obvious, but even if you have them backlit as much as possible, they will still be squinty. Instead of them squinting and straining while trying to look at you, have them look at each other (if applicable), look away, look down—anything but straining to look directly at your lens. Squinting, harsh light, and shadows on your subjects’ faces make for unflattering portraits. Save the looking-at-the-camera and smiling portraits for when the lighting is better or the sun is lower in the sky.
Move around your subjects, looking for the best light
This isn’t just a tip for harsh light, but for all light: move. Moving around your subject allows you to look for the best light. Yes, even in harsh light, you can position yourself to achieve a different feel and even make the light more flattering. Try positioning yourself so that the sun is at your side, instead of shooting directly into the sun. When you use side light, you’ll find there is significantly more contrast and the light is less hazy compared to shooting backlit.
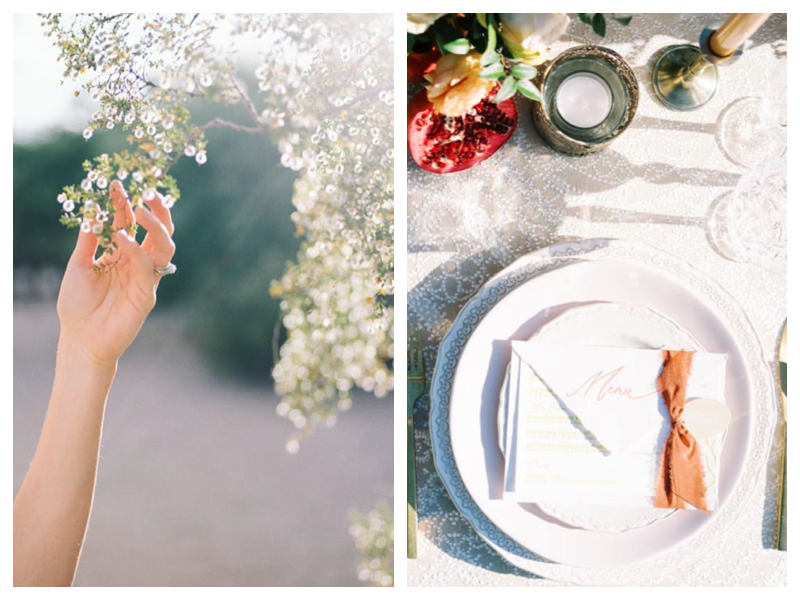
Focus on the details
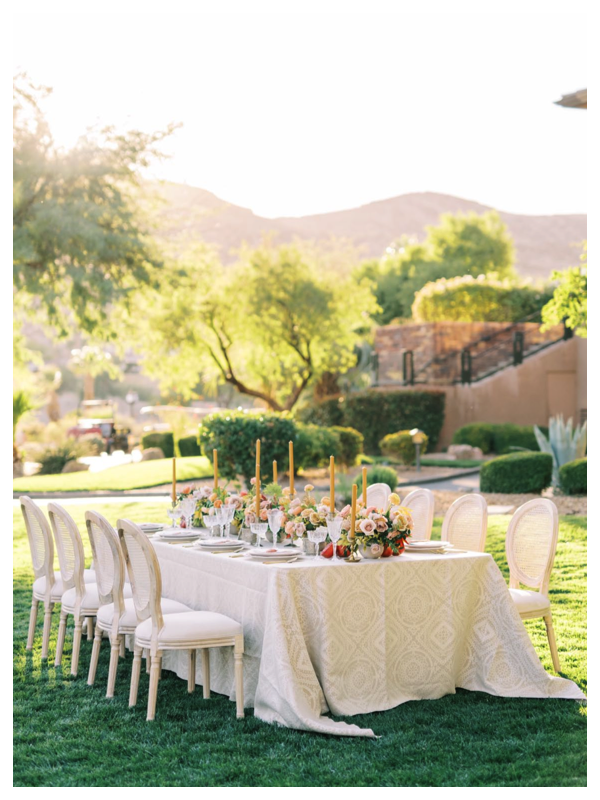
Rather than trying to get wide shots in direct, harsh light, get in close and focus on the details while using your subjects to provide some shade. When the lighting isn’t ideal for portraits, know that there are always other photos that will turn out beautifully during this time. Focus on the rings, the veil, hair pieces, bracelets, and dress details. Also, table settings and other details can work quite well in harsh light. You can get interesting shadows and light play with full sun and harsh light.
Scout the location
There’s rarely a location that doesn’t have an area of good light. Of course, the hardest location would be flat, open desert at mid-day. But other than that, I can’t think of many situations where I’ve been forced to shoot in intense, harsh mid-day sun for the entire session or wedding. Even if you didn’t choose the location or the timing, I’m sure there’s an area within walking distance that’s great for softer, natural light portraits. And it might even be indoors near a window. There’s always some shade, a building, a little corner or area with good lighting. You just have to go searching.
What to Look For
Trees for a bit of shade for your subjects, so they aren’t squinting with harsh shadows across their faces. An added bonus is that trees create beautiful, bokeh-filled backgrounds.
A neutral ground reflector. Cement sidewalks are great for this and will help reflect neutral tones and light back onto your subjects. Grass is not a good reflector, especially in harsh light, and will give your subjects a green cast that is nearly impossible to get rid of in post.
The shaded side of a building. If one side of a building is super sunny, another side will be more shaded. Walk around and utilize a different area. Even if it’s the “ugly backside,” if it has better lighting it will make for better images. And if it’s not that pretty, pull your subjects as far away from the background as you can and lower your f-stop. The lower f-stop will turn the background into soft, bokeh, buttery goodness.
Poses that flatter. If the lighting is still harsh or spotty, try to position them by turning their bodies until the lighting is more even across their faces and bodies. You can also focus on one subject rather than all. One pose I love to do is having one person snuggle into the chest of their partner. This will allow their face to be shaded by the other person’s body. It’s super romantic and flattering even in harsh light.
What to Stay Away From
Water. I wouldn’t suggest photographing people in front of or around water in intense light. It becomes a very large and distracting reflector in the images.
Telling yourself you’ll fix it later. I wouldn’t suggest photographing in bad lighting thinking you’ll be able to fix it in Photoshop. You might be able to, you might be a Photoshop wizard, but if you continue to lean on the crutch of post-production, you aren’t allowing yourself to become a better photographer who can find good lighting in any and all situations. Also, do you really want to live your life behind a computer?

Control the Situation
You can’t control the weather. You can’t completely control the event. However, you can—and should—control the time you are outside photographing.
I used to ask my portrait clients when the best time was for them, but now I tell them—nicely, of course. The choice they have is sunrise or sunset, the two best times for photographing, especially in the desert. Your area might be a little different, but in general, early morning and right before sunset are the best lighting situations for photographing outside.
Controlling the timeline isn’t about being bossy. It’s about controlling the lighting and the situation to produce the work they hired you to create. It’s your responsibility as the photographer to communicate and inform your client about why it is best to photograph at certain times of day.
Wedding photographers: be present and involved with the planning of the timeline from the very beginning. Let clients know what times are best for photographing outside, especially if they’re planning an outdoor ceremony or portraits. Your clients are not lighting experts—you are. They’ll appreciate the guidance.
In some cases, you can’t change the timeline or the order of events. But you can control how and where you pose them.
Harsh Light Is Not the End of the World
Capturing the moments, the feelings, and telling the story is more important than having perfect lighting. Life isn’t perfect. Lighting isn’t perfect. But the story and the people you are capturing in that exact moment are perfect the way they are and deserve to be documented.
Do the best you can with what you’re given—and let go of what you can’t control. Don’t stress. Don’t get flustered. It only makes the situation worse.
Keep looking for the special moments between the family or the wedding couple. Keep searching for great lighting. Don’t be scared to move, to try something different, and if it’s not working—switch it up.
Trust your instincts. Trust yourself as an artist. And just capture.
Kristen Krehbiel specializes in intimate and fun, unconventional desert elopements. Kristen grew up in a tiny town in Iowa and spent her college years living in several different states and countries. After traveling, she settled in Las Vegas and quickly fell in love with the desert, as well as colorful downtown, and of course, elopements.
Kristen and her husband, Trevor, recently moved to Southern California with their pups, Mads and Porter, and their little bird, Chappie. Obsessed with mid-century modern design and the desert, Kristen is excited to start capturing weddings and elopements in Palm Springs and Joshua Tree too.
Website: kristenkayphotography.com
Instagram: @kristenkayphotography
